Why Your Solar Generator Charges Slower Than Advertised
You connect 400W of solar panels to your power station's "500W max solar input" port and watch the display settle at 260W. The math should work — but the number stays stubbornly low even in full sun. The advertised solar input rating is a ceiling under ideal conditions, not a guarantee. Real-world charging speed depends on three constraints most spec sheets don't explain: the MPPT charge controller's voltage window, its amperage limit, and your panel's actual field output. Understanding these constraints turns guesswork into predictable results.
Why Solar Input Ratings Mislead
Every solar generator's charge controller has three hard limits that interact in ways the headline spec obscures.
The MPPT Voltage Window
The charge controller only accepts power from panels delivering voltage within a specific range — typically 11-60V for compact stations, 30-150V for larger units. Panels outputting voltage below the minimum get rejected entirely. Panels above the maximum trigger overvoltage protection and shut down charging. Even expensive panels are useless if their voltage falls outside this window.
The voltage your panels produce changes with wiring configuration. Two 100W panels rated at 18V each produce 18V in parallel but 36V in series. If your station accepts 11-60V, parallel works. If it requires 30-150V (common on high-wattage stations), you must wire in series or the controller rejects the input.
The Amperage Cap
Charge controllers have a maximum amperage limit — often 10A, 12.5A, or 25A depending on the station. When you hit this limit before reaching the advertised wattage cap, charging speed plateaus.
Example: A station rated for "500W max solar input, 11-60V" with a 12.5A controller caps out at 750W only if panels deliver 60V (12.5A × 60V = 750W). With panels delivering 30V, you hit the 12.5A limit at just 375W (12.5A × 30V), regardless of how many panels you add. The voltage of your array determines whether you hit the amperage wall or the wattage wall first.
Real Panel Output in Field Conditions
A "200W" solar panel rating reflects laboratory conditions: 25°C panel temperature, 1000W/m² irradiance, perpendicular sun angle. Field conditions rarely match.
Real-world derating factors:
- Temperature: Panel efficiency drops 0.3-0.5% per degree Celsius above 25°C. A panel at 65°C in summer sun loses 12-20% of rated output.
- Irradiance: Early morning, late afternoon, haze, and seasonal sun angle all reduce available light below the 1000W/m² standard.
- Angle: A panel 30° off perpendicular loses roughly 13% output; 45° off loses 29%.
- Cable losses: Undersized or long cables waste 5-15% to resistance.
Expect 65-80% of nameplate rating under good field conditions, 40-60% under typical camping scenarios. Your "400W" panel array delivers 260-320W in practice.
The Math: Wiring Configuration Changes Everything
Consider two 100W panels (each rated 18V, 5.5A) connected to a power station with an 11-60V input window and 10A amperage limit.
| Configuration | Voltage | Amperage | Theoretical Max | Actual Input (field @ 70%) |
|---|---|---|---|---|
| Parallel | 18V | 11A | 198W (hits 10A limit at 180W) | 126W |
| Series | 36V | 5.5A | 198W | 139W |
Parallel hits the 10A amperage cap before reaching full panel capacity. The controller limits current to 10A, capping input at 180W (18V × 10A), wasting the extra 18W your panels could deliver.
Series doubles voltage, halves amperage. At 36V and 5.5A, you stay under the 10A limit and extract the full 198W the panels can theoretically produce — 139W after field derating.
For this station, series wiring captures 10% more real power. The gap widens with more panels or higher-wattage arrays.
How to Hit Your Station's Max Solar Input
Achieving advertised charging speeds requires matching panel specs to controller limits. Follow this checklist:
1. Find Your Station's MPPT Voltage Window
Check the manual or manufacturer specs for "solar input voltage range." Common ranges:
- Budget/portable stations: 11-28V or 11-60V
- Mid-size stations: 11-100V or 30-150V
- High-capacity stations: 30-150V or 40-450V
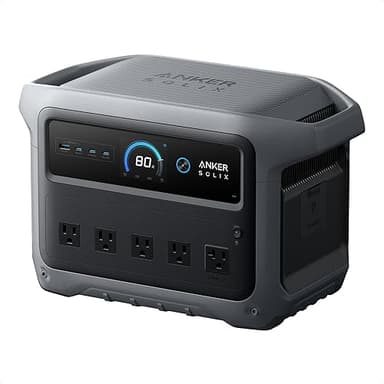
The Anker SOLIX C1000 Gen 2 (currently $449.99) accepts 600W max solar input. According to manufacturer specs, its MPPT window is 11-60V. To hit 600W at the low end (11V), you'd need 54.5A — well above typical controller limits. At 48V (four 12V panels in series), you need just 12.5A. Series wiring is essential.
2. Calculate Series vs Parallel Voltage
- Series: Add voltages, amperage stays the same. Three 20V panels = 60V, 5A.
- Parallel: Add amperages, voltage stays the same. Three 20V panels = 20V, 15A.
- Series-parallel hybrid: Combine both. Two strings of two panels each (series) connected in parallel = doubled voltage from series, doubled amperage from parallel.
Match your total array voltage to the station's window. If your station requires 30V minimum, you need at least two 18V panels in series.
3. Use Adequate Cable Gauge and Length
Thin or long cables waste power to resistance. For runs over 10 feet:
- 10 AWG: Up to 30A (360W at 12V, 1440W at 48V)
- 12 AWG: Up to 20A (240W at 12V, 960W at 48V)
- 14 AWG: Up to 15A (180W at 12V, 720W at 48V)
Undersized cables heat up and drop voltage. A 20-foot run of 14 AWG cable carrying 20A loses 6% of power to resistance. Use the shortest, thickest cable practical.
4. Optimize Panel Angle and Temperature
Point panels perpendicular to the sun for maximum irradiance. In summer, tilt equals your latitude minus 15°. In winter, latitude plus 15°. For portable setups, adjust angle every 2-3 hours or accept 10-20% losses.
Keep panels cool when possible. Elevate them for airflow underneath — a panel sitting flat on hot asphalt can reach 80°C and lose 20% output compared to the same panel elevated in moving air.
5. Monitor Real-Time Input
Most stations display live solar input wattage. Compare this to your panel's nameplate rating × 0.7 (realistic field output). If you're seeing significantly less:
- Check voltage is within the MPPT window (use a multimeter on the panel output under load)
- Verify cable connections are tight and corrosion-free
- Confirm panels aren't shaded (even 10% shading can drop output 40-50% due to bypass diode behavior)
- Test panels individually to identify underperformers
Solar Input Specs Compared
| Spec | Anker SOLIX C1000 Gen 2 | EcoFlow Delta Pro 3 | Jackery Explorer 2000 Plus | EcoFlow Delta 2 |
|---|---|---|---|---|
| Capacity | 1024 Wh | 4096 Wh | 2042 Wh | 1024 Wh |
| Continuous Output | 2000 W | 4000 W | 3000 W | 1800 W |
| Surge Output | 3000 W | 8000 W | 6000 W | 2700 W |
| Weight | 24.9 lbs | 113.5 lbs | 61.7 lbs | 27 lbs |
| Battery Chemistry | LiFePO4 | LiFePO4 | LiFePO4 | LiFePO4 |
| Cycle Life | 4000 cycles | 4000 cycles | 4000 cycles | 3000 cycles |
| Recharge Time | 49 min | 60 min | 120 min | 80 min |
| Max Solar Input | 600 W | 2600 W | 1400 W | 500 W |
| Outlets | 6 AC · 1 Car · 2 USB-A · 2 USB-C | — | — | — |
The EcoFlow Delta Pro 3 (currently $2599.00) leads with 2600W max solar input, allowing full recharge of its 4096Wh capacity in under two hours of strong sun. The Anker SOLIX C1000 Gen 2 (currently $449.99) and EcoFlow Delta 2 (currently $449.00) both offer 500-600W input for their ~1000Wh capacities — adequate for 2-3 hour recharge times with properly configured panels.
When comparing stations, the ratio of solar input to capacity matters more than absolute wattage. A 600W input into 1024Wh (Anker SOLIX C1000 Gen 2) provides faster recharge than 1400W into 2042Wh (Jackery Explorer 2000 Plus) — 1.7 hours versus 1.5 hours under ideal conditions, but the smaller station is far easier to power with portable panels.
For off-grid use, prioritize stations where max solar input is at least 50% of capacity in watt-hours. This ensures practical single-day recharge even with field derating. The Delta Pro 3's 2600W into 4096Wh (63% ratio) and SOLIX C1000's 600W into 1024Wh (59% ratio) both clear this threshold comfortably.
Common Questions About Slow Solar Charging
Can I exceed the rated solar input without damaging my power station?
No. The charge controller will limit input to its maximum rated wattage and amperage, but attempting to exceed voltage limits (by wiring too many panels in series) can trigger overvoltage protection or damage the controller. Exceeding amperage or wattage limits simply wastes the extra capacity — the controller clips input at its ceiling. Always stay within the specified voltage window and don't expect to exceed the wattage rating even with oversized arrays.
Why does my power station reject my solar panel completely?
The panel's output voltage is outside the MPPT controller's acceptable range. Measure panel voltage with a multimeter under load (connected to the station). If it's below the minimum (often 11V or 30V depending on model) or above the maximum (commonly 60V, 100V, or 150V), the controller rejects it. Rewire panels in series to raise voltage or parallel to lower it, ensuring the result falls within the specified window.
Should I wire my solar panels in series or parallel?
Series if your station's MPPT window allows it. Series wiring (connecting positive of one panel to negative of the next) adds voltages while keeping amperage constant, which helps you stay under the controller's amperage limit while maximizing wattage. Parallel wiring (all positives together, all negatives together) keeps voltage low but adds amperage — useful only if your panels individually produce voltage too high for the station's maximum, or if you need to stay under a minimum series voltage for safety reasons. Check your station's voltage window first, then calculate which configuration keeps you inside it while delivering the most watts.
Can I use third-party solar panels with my power station?
Yes, provided the panel's voltage output falls within the station's MPPT range and you use the correct connector or adapter. Most stations use MC-4, XT60, or proprietary connectors. Match the connector type or use a verified adapter cable. Verify the panel's open-circuit voltage (Voc) and operating voltage (Vmp) are within spec — Voc is always higher than Vmp and is what matters for overvoltage protection. Manufacturer panels are often overpriced for the specs; third-party panels from established solar brands work identically if voltage and connector match.
How long does it take to charge a 1000Wh power station from solar panels?
With properly configured panels delivering 500W actual input (after field derating), approximately 2-2.5 hours from 0-100%. Charging slows in the final 10-20% as the controller tapers current to protect the battery. Real-world factors extend this: 500W of panels typically deliver 350-400W in field conditions (70-80% of rating), increasing charge time to 2.5-3.5 hours. Morning or late afternoon sun, non-optimal angles, and high panel temperatures all add time. Budget 3-4 hours of good sun for a complete recharge of a 1000Wh station with 400-500W of panels.
Does cold weather improve solar charging speed?
Cold temperatures improve panel efficiency (panels produce rated output at 25°C and gain 0.3-0.5% per degree cooler), but winter sun angle and shorter day length usually offset the gain. A panel at 0°C in winter produces about 10% more power than the same panel at 25°C — but if the sun is 30° lower in the sky, you lose 13% to angle, resulting in net slower charging. Cold weather helps most when you can actively track the sun and maintain perpendicular angle, capturing the efficiency gain without the angle penalty.
Recommendations: Matching Panels to Your Station
If your station charges slower than expected, measure the actual input voltage with a multimeter and compare it to the MPPT window in the manual. Rewire panels to bring voltage into range — series for higher voltage, parallel for lower. Use the shortest, thickest cables your setup allows, and verify connections are clean and tight.
For new purchases, choose a station where max solar input is at least 50% of battery capacity in watt-hours. The Anker SOLIX C1000 Gen 2 (currently $449.99) offers the best input-to-capacity ratio in the 1000Wh class at 600W, enabling fast recharge with commonly available 200W portable panels. Wire two in series: that lands around 36V operating and ~44V open-circuit — safely under the 60V cap, and in the higher-amperage tier of the controller. Three 18V-class panels in series would exceed 60V open-circuit and trigger overvoltage protection, even though their operating voltage looks safe on paper. For whole-home backup requiring faster recharge of larger capacities, the EcoFlow Delta Pro 3 (currently $2599.00) justifies its cost with 2600W solar input and wide MPPT voltage range accommodating large rooftop-style arrays.
The advertised maximum is achievable — but only when panel voltage, wiring configuration, and field conditions align with the charge controller's actual operating constraints.